

When it comes to your durable belongings, like books and clothing, packing can feel like a breeze.
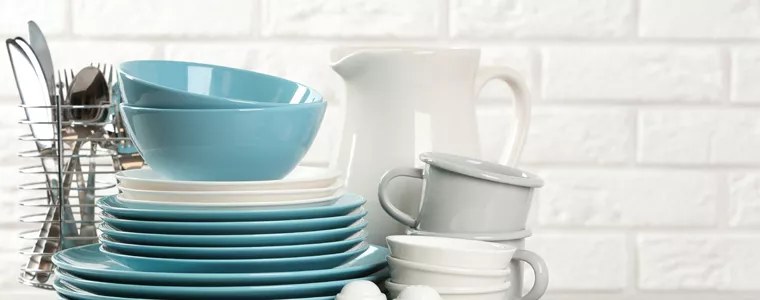
But when you’re standing in your kitchen, surrounded by plates, glassware, dishes and other breakables, it can feel overwhelming.
So where do you start when you need to protect your most fragile items on their journey to their new home? (Hint: It’s not just about collecting boxes and buying a few rolls of packing tape!)
In our opinion, to pack your dishware like a pro, you need four things:
Resource #1: Plenty of Time

Of all the rooms you pack, your kitchen will likely take the longest. All those breakables, odd-sized small appliances and flatware will require extra care and cushioning from plenty of packing material.
As a result, the most important asset you can have on hand is time.
Give yourself the wiggle room you need to:
- Collect the specialized materials you’ll need. (More on that below!)
- Wrap everything meticulously for safe transit.
- Organize and label thoughtfully for easy unpacking.
However, if you’re pressed for time, you may find yourself skimping on materials, wrapping haphazardly and shoving things in random boxes just to finish the job.
Your first step in packing your dishes successfully is to give yourself the most important resource you need: the time to do the job right.
Resource #2: The Right Kind of Boxes

The second thing you’ll need are dish boxes, or what the moving industry commonly calls “dish packs.” This specialized type of packing box offers a double layer of corrugated cardboard that’s extra strong so it’s more resistant to crushing.
Because of their superior construction, dish packs do cost more than regular corrugated cardboard boxes. So, you’ll want to make sure you only pack your most fragile items inside. However, the extra protection they provide is well worth their cost.
To go along with your dish packs, you’ll also want to get a couple of cell dividers—those cardboard grids that divide a larger box into smaller columns. They’ll be perfect for packing cups, especially extra-fragile items like wine glasses.
Pro Tip: When you’re collecting materials, it might be tempting to re-use old boxes you have around or collect them at places like liquor stores.
But here’s the problem: Cardboard boxes—even dish packs—weaken considerably after their first use. Additionally, if they’ve been sitting in your attic or your basement, they might have gotten some moisture in them, which can seriously undermine their strength.
So although it might seem like a great way to save money, to give your kitchen items the protection they need, it’s best to purchase new boxes from a moving supply company.
Resource #3: Packing Paper (and the Right Wrapping Technique!)
Packing paper is the unsung hero of your kitchen move. Your time and care matter, as do the boxes that hold your items, but the most important piece of the puzzle is the paper that protects your items inside.
With the right paper and the right packing technique, you’ll have the ability to cushion your fragile items against the inevitable bumps that occur during the moving process.
We recommend white packing paper, which is essentially unprinted newsprint. If you’re trying to save on your move, you can squirrel away old newspapers. However, the newsprint will rub off on your dishware and you’ll have to clean everything carefully after your move. With packing paper, you won’t have that problem.
Like the dish packs, you can buy rolls of packing paper from a moving supply company.
Once you have the right paper, the right technique makes all the difference.
Packing Paper Rule #1: You cannot use too much paper. More paper generally equals more protection.
First, crumple enough packing paper to create a 1-2″ layer of protection on the bottom of the box.
Then, you’ll want to take a few sheets of paper, lay them on a flat surface and put your item in a corner. Wrap up the item diagonally and tuck in the edges as you go.
If you’re wrapping plates, put another on top of the bundle you’ve just made, then put the two plates on top of another 2-3 sheets of paper and wrap them together. Do the same thing again until you have a bundle of four plates, then tape them all together with another layer of paper on top.
You can do the same with a stack of bowls, but keep those stacks to two or three bowls per bundle.
When it comes to cups, crinkle a sheet of paper inside the cup, then repeat the technique above, putting the cup in a corner of 2-3 sheets of paper and wrapping diagonally.
As you wrap, keep in mind . . .
Packing Paper Rule #2: Your goal is not to create a perfect, pretty package. It’s to give each bundle the protection it needs as it moves to your new home.
When in doubt, think back to Rule #1, and don’t skimp on the paper.
As you wrap, place each bundle or package to the side. Once everything is swaddled in paper, you can move to the final step.
Resource #4: Proper Positioning
There’s one final pro technique you need to get your dishware safely to your new kitchen: The right arrangement for maximum protection.
Plates: Take a bundle and set it on its side in the box. Do not lay it flat. Place another bundle next to it and pack with paper in between. Continue until you have a row of dishes that fit snugly in the box. They shouldn’t move around once they’re in position.
Pro Tip: If you hear your items knocking together as you place them in the box, you didn’t use enough paper. Wrap on another layer or two to add more padding. You can also use pieces of cardboard to separate bundles of plates.
Bowls: Small bowls should also lay on their sides, like your plates. Large mixing bowls, once wrapped, can be placed in a stack upside down on their rims.
Cups: Ideally, cups and glasses can go in a box with cell dividers, once they’re wrapped. Smaller cups like teacups can be placed upside down on an upper layer of a box. Just make sure to place a layer of crumpled paper or cardboard between the layers. You’ll also want to make sure all the handles face the same way.
Finally, make sure you fill your dish pack to the top. Remember, you don’t want things to shift around, and empty space leaves your dish box more vulnerable to crushing.
Instead, pack the box until two to three inches remain at the top, then cushion everything with a layer of crumpled paper that reaches the top.
Secure your dish box with plenty of tape and label it clearly with the contents and the word FRAGILE on several sides.
That’s it! Your dish pack is ready to go.
Packing your most fragile items can feel intimidating. However, with these four resources at your fingertips, you’ll find yourself perfectly positioned to successfully transition your kitchen.
And if you decide you need help with the packing process, don’t be afraid to call in the pros! Plenty of full-service moving companies would be happy to come to your house and pack your entire kitchen for you. They’ll arrive armed with the right equipment and the right techniques to get even your most fragile items safely across the Pacific.


