

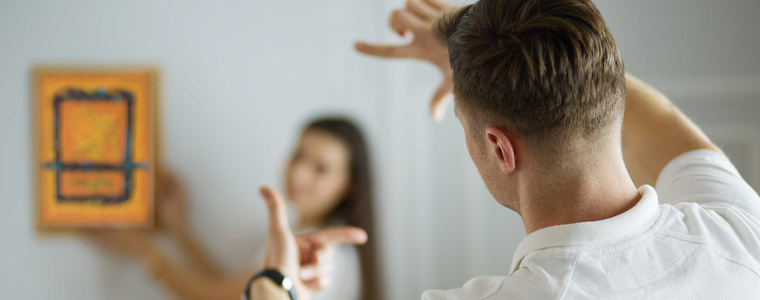
When it comes to fragile items that people worry about when they move, artwork, paintings, frames, and mirrors top the list. (This is especially true for moves between the mainland and Hawaii, when you’re sending your treasured piece of art ~2500 miles across the Pacific Ocean!)
If you’re doing a door-to-door move, your moving crew will take care of everything for you.
However, if you’re doing the packing yourself, not to worry. We’ve got some DIY tips that will make it easy to pack your artwork, frames, paintings, or mirrors—and feel confident that they’re prepped well for the journey. (And, if you’ve decided to ship a painting or two, you’ll get some good pointers from this article, too.)
First, though, let’s start with a question . . .
How Much Is Your Artwork Worth (to You)?
Maybe that sounds like a harsh query—or maybe it feels way too personal. Trust us, we wouldn’t ask if it weren’t important!
High-value art, whether its value is monetary or sentimental, may require some extra special treatment, such as custom crating. For example, our Kauai team once moved an oversized hand-blown glass sculpture of an octopus that was suspended in a glass display case. The team created a custom crate to protect this piece of art, floating the glass pieces of the sculpture in peanuts to keep them safe during transit.
Now, if you’re moving an oversized mirror from IKEA, this kind of treatment may be overkill. In cases like these, our DIY solutions below may be just what you need.
However, if you’re moving a valuable painting in a delicate, decorative frame, you may want to invest in a solution that will give it maximum protection, such as a custom crate.
By the way, this is a great reason to request an in-person survey from your moving company. If you’ve got an expert doing a walk-through, he or she will be perfectly positioned to evaluate exactly your artwork and offer recommendations tailored to your situation.
An in-person survey is also a great time to ask questions about the options you’ll have to protect your move, including your artwork. If you’re concerned about what might happen if your artwork gets damaged in transit, ask about full-value protection. (You might think of it as “moving insurance,” although regulations don’t allow moving companies to call it that.) By understanding your options, you’ll give yourself a little extra piece of mind during your move. Your surveyor should be able to get you the answers you need.
Now, if you’ve decided to do the packing yourself, we’ve got some tips for you to protect these delicate items in transit.
5 Easy Steps for Packing Your Framed Art, Paintings, and Mirrors
When it comes to protecting fragile items like artwork and mirrors, you’ll need a few key moving supplies and a few specialized techniques to give these items the protection they need in transit. We’ll walk you through it in five simple steps.
First, a quick note about the supplies we mention below:
- Boxes: Re-using boxes isn’t always the best idea, especially for long journeys. When it comes to artwork, it’s worth investing in new boxes in dimensions that fit your pieces well. (More on that below!) You can source boxes from moving and storage companies, hardware stores, online retailers, and mail/shipping stores.
- Corrugated cardboard pads: These flat pieces of cardboard great for adding extra cushioning to fragile items. You should be able to find them in the same place you buy your boxes.
- Painter’s tape: Available at any hardware store, this blue tape is great for temporary application because it won’t leave adhesive residue behind.
- Stretch wrap: Think of an oversized roll of saran wrap, and you’ve got the idea.
- Bubble wrap: You’re probably familiar with this handy piece of packaging, and it’s great for cushioning art and mirrors for moving (and shipping!).
- And, of course: Packing tape and markers, the staples of any move.
Once you have the right supplies, it’s time to put them to work.
Step #1: Get the Right Boxes
Securing your supply of mirror/picture boxes may require a little investment up front, but they’ll save you a ton of time and hard work in the long run. Start by measuring the pieces you want to pack so you know exactly what sizes and types of boxes to buy.
Note: If you’re shipping your artwork, you may want to talk to the carrier you’re planning to use. Different sizes can come with very different prices. (Even a couple inches can make a huge difference!) Talk to them up front to make sure your DIY solution stays on budget.
There are two things you need to know about mirror/picture boxes:
1. They come in three types:
- Pre-sized boxes – Available in several sizes, with dimensions sized specifically to accommodate mirrors and framed art.
- Telescoping boxes – Usually two pieces, with one that fits inside the other so the length of the box can be extended for the perfect fit.
- Four-piece boxes – These boxes are made up of four, overlapping pieces that are taped together to create a custom-sized box.
2. Size matters.
When selecting a box, choose one that will give you 1-2 inches around the edges of your piece, maybe a little more if the item is particularly fragile. Again, if you’re shipping your pieces, talk to your carrier to help you price out your shipment.
Step #2: Wrap It!
Now, that you’ve got the right box picked out, it’s time to give your piece the protection it needs inside the box. That starts by wrapping it, and what you wrap it with will depend on exactly what you’re packing.
Artwork that’s not behind glass: Especially if this item is a collector’s piece, you’ll want to make sure that anything that comes into contact with the surface of your artwork is archival quality. Grab yourself some acid-free glassine paper and use that to cover the surface of your artwork. You may consider securing it to the frame (if there is one) with painter’s tape.
Glass-Framed Artwork: With these types of pieces, your biggest concern is protecting the art in case the glass breaks during transit. One of the best ways to do this is to tape the glass with painter’s tape. Start by taping an X across the glass. Then, overlay that X with another one, forming a star pattern. That way, if the glass happens to shatter, the tape will prevent the glass shards from damaging the art. Then, wrap the whole piece in stretch wrap. If there is any breakage, it will be contained by the stretch wrap, and it will be easier to clean up on the other end.
Mirrors: Follow the same procedure as with framed artwork. Tape the mirrored surface, then wrap in stretch wrap.
Step #3: Add an Initial Layer of Cardboard
To offer your fragile item a little more protection, we’re going to give it one more layer of cardboard inside its box.
Now, depending on how concerned you are about protecting your artwork or mirror, you can spend a lot of time and energy on this step. We’re going to offer you three options so you can customize your level of effort: good, better, and best.
Good: Put four corner protectors over the stretch wrap and call it a day. This is probably best for a piece that’s less delicate, such as an unframed canvas that has some sentimental value but maybe not as much monetary value.
Better: Make a cardboard sandwich. Grab two cardboard pads, and cut two pieces of “bread” that overhang your piece on all edges by 1-2″. Pinch the edges of the “bread” together and tape them together on all four sides, essentially suspending your artwork in the center of the sandwich.
Best: Go the extra mile and make a mini-box out of the cardboard pads. You might think of it as wrapping your piece of artwork like an enchilada. However, unlike a tortilla, corrugated cardboard doesn’t bend as easily. So what you’ll want to do is place your artwork on the cardboard pad and score the cardboard so it folds neatly around your piece. Just like an enchilada is open at the top and bottom, it’s fine to leave your piece that way for now.
This method will involve some measuring, some math, and a lot of patience, but you’ll ultimately end up with a piece of art that’s got cardboard wrapped around it 360 degrees. Secure the “tortilla” with tape. As for the open top and bottom, pinch the cardboard together at one end and secure it with tape. Then do the same with the other end.
Then, pause and admire your work with the knowledge that you’ve given your artwork or mirror a strong layer of protection for its journey.
Step #4: Wrap It—Again!
Now, you’re going to take that whole package and wrap it again in bubble wrap.
At this point, you’ll want to eyeball your piece against your chosen box and check the fit. One of the most frequent sources of damage to fragile items is extra room in a box. It allows items to shift inside, and it also can undermine the integrity of the box, leaving it vulnerable to crushing.
Wherever it looks like you might have room, set aside some extra bubble wrap to fill those gaps.
Step #5: Box It, Tape It, and Label It
Slide the whole neat package you’ve created into your chosen box. Pack any extra space with bubble wrap, and tape the box shut securely. Don’t forget to label your box clearly so you know exactly what’s what on the other end.
Finally, bask in the satisfaction of a job well done, and move on to the next piece that deserves your attention.
Your Framed Artwork, Paintings, and Mirrors Packed Safely and Securely
Now that you know the ins and outs of custom crating and DIY packing for your artwork, frames, and mirrors, you’ve got all the knowledge you need to protect these items during your move, whether you’re headed across the Pacific Ocean, across the country, or across town. It’s these personal pieces that truly make us feel at home, so you can feel confident knowing that you’ve given them the special handling they need to arrive safely and grace the walls of your new home.
_____
If you’d like to talk to one of our experts about moving your fragile artwork or mirrors, just reach out. We’ve moved plenty of fragile items from Hawaii to the mainland and back again, and we’d be happy to help you. Schedule a free consultation with one of our experts to get started.


